Creating a Free TexturesQuality Overlay is one of the basic steps in 3D Visualization . We see that many of our friends who are involved in visualization are interested in the details of the coatings created by looking at the work done in groups and pages.
Creating a Quality Free Textures or removing channels from the coating after downloading it from any texture site is a crucial factor for your 3D project
In this article, we will explain the tasks of the coating channels and where you should use them.
It is important to remove the overlay channels and modify them on the 3D programs , to create the desired reflection and different overlay parameters.
What is PBR Material?
Physical Based Render (PBR) is a method of shading and rendering that provides a more accurate representation of how light interacts with surfaces. It can be called Physical Based Render (PBR) or Physical Based Shading (PBS).
Why is it important to drill down?
If you use the overlays you have downloaded from the overlay sites in your work without making any adjustments, you will get an image.
As a result of rendering, the image will appear raw and untreated, hazy.
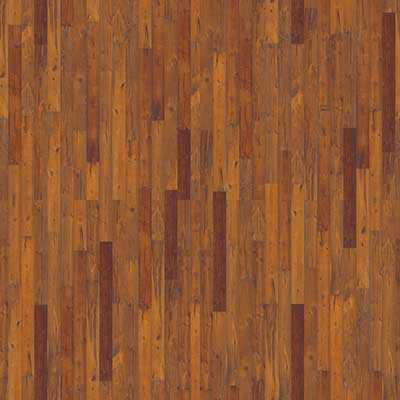
For example, when we consider wood veneer as follows, we can see that the veneer has natural properties such as roughness, segmented parts and reflection. We can create these natural features easily by using texture programs
You can give the features such as reflection of the textures (where the light reflects), roughness and segmentation by using the coating channels that we have explained in the lower part by using programs in 3d rendering engines.
In all of your work, you can use these channels on the type of texture you want. At the same time, creating a quality effect is related to how effectively you use the parameters in your rendering engines.
There are important parameters such as reducing the effect of the channels you use in rendering engines.
You need to change these parameter values and bring your coating to the shades you want with the continuous test steps.
Coating Channels for Quality Coating
Coating channels are necessary for us to give a quality natural effect on the coating. These channels have the same name contrast in rendering engines. We should use the same channels in channels within the same rendering engines.
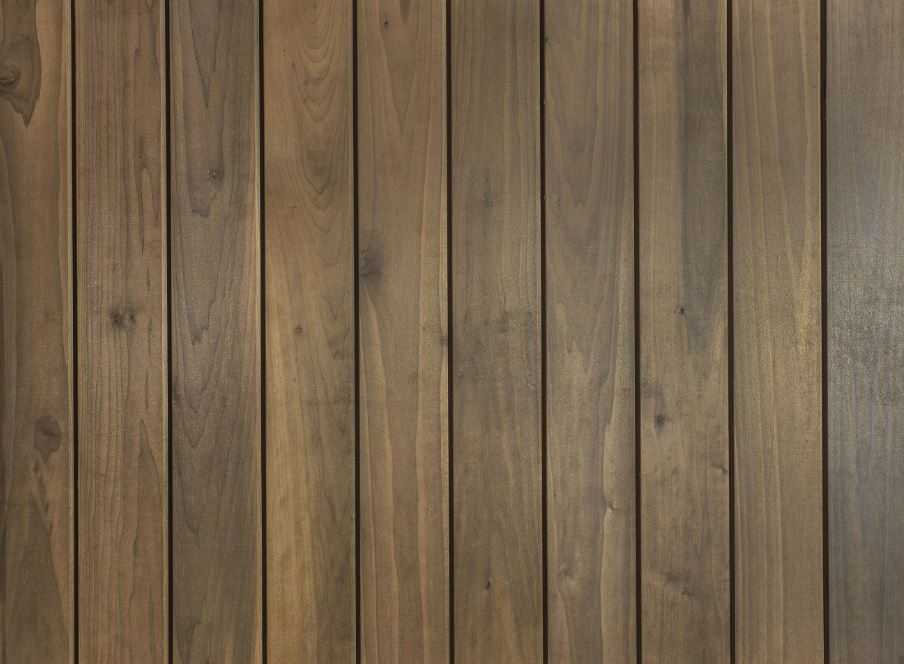
Diffuse : It is the main basic form of coating. In other words, we can not create other sub-channels without this main coating. Diffuse picture is as follow
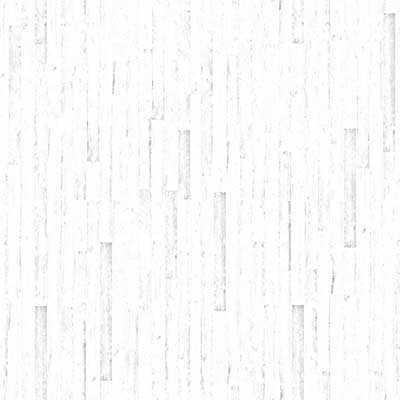
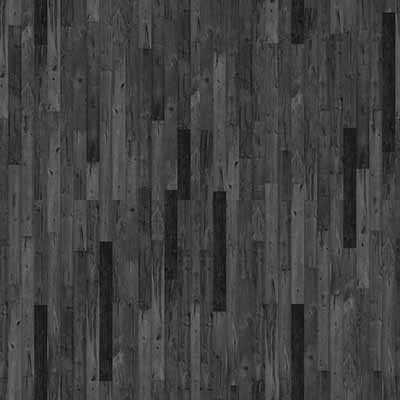
Ambient Occlusion : It is an ideal channel for your textures to have more pronounced and more shade details. For rendering engines such as Vray and Corona, you should use this texture with the Diffuse channel. The picture below is the Ambient Occ channel.
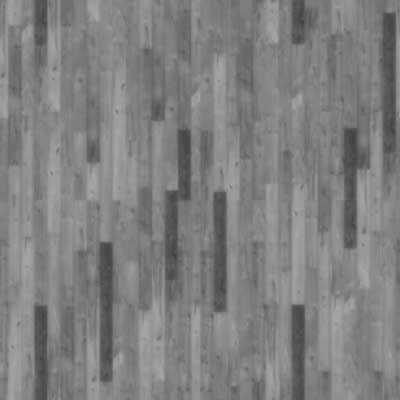
Reflection: This channel specifies where the reflection should and should not appear. The black-and-white ratio determines where the reflection is more or less.
Glossiness : With this channel, you can control the sharpness of reflections. The following Channel is Glossiness channel.
Bump : A black and white channel used to further enhance the rough surface details in 3D software. Works less detail than normal map and Displacement map. Ideal for speed. The black and white version of the diffuse coating refers to the bump texture.
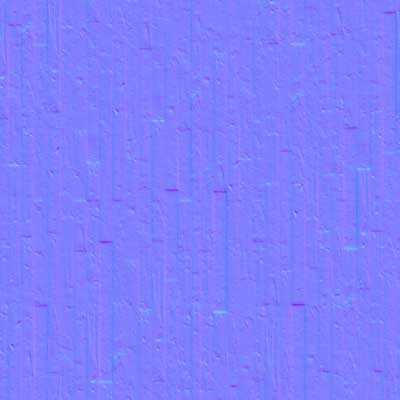
Normal Map : It is a purple color channel used to further improve the rough surface details in 3D Software. The following channel is the Normal Map channel.
Displacement: Makes depth and collapse on the surface mathematically according to the ratio of black and white tone composed of the main texture. It can be used on ground, rock, soil or surfaces where you will go into many details. The following channel is the Displacement channel.
How can we use Overlay Channels in 3D programs?
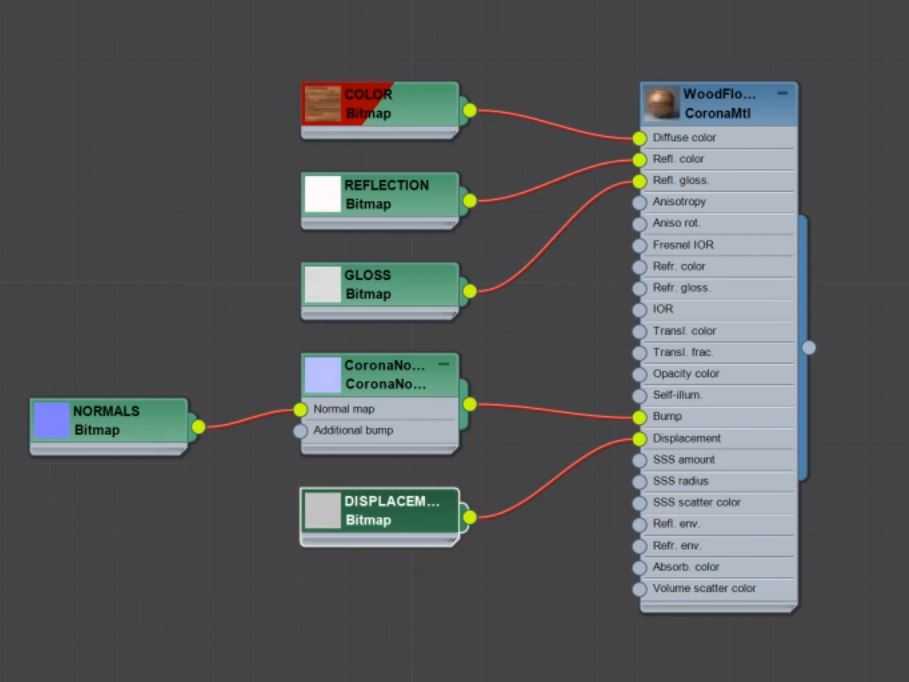
The logic and channels in Blender , 3dsmax Vray , Corona , Lumion , Twinmotion , Sketchup Vray and other rendering engines continue to be combined with the same operation. Since all have the same channels, you can add channels as in the following 3dsmax Corona Render image.
You can add the channels you have received from the programs we have given at the bottom part to the places shown below in the related rendering engines. Although there is a slight change between programs and Render engines, the logic is the same.
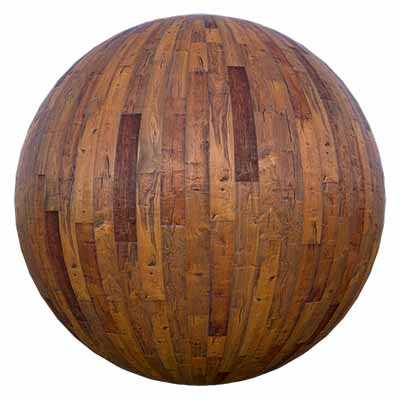
The result will be as follows when you use all the coatings. This way you can get different effects according to the amount of light you will use on your stage.
Wood floor covering with all channels added and adjusted
What Programs can we use to remove these channels?
The main purpose of the program below is to remove the channels of the overlays that you will add to the Diffuse channel. The programs have different usage features. You can easily play in these programs with the shades of the coatings you add to the channels.
Although most of these programs are paid, we will introduce a free and paid one.
You can download the free Materialize Program here . Watch the video below for use. With detailed settings you will get the desired effect on a lot of finishes.