In the Sketchup Vray interior work, some criteria must be considered in order to set sufficient lighting logic in the interior. In this article, I will talk about how you should follow the lighting logic.
You can use this logic in all rendering engines.
In Sketchup vray interior work or any rendering engine work, users have always sought a trick. Or they think that there is a “trick” that we don’t know, but you can capture enough light indoors with the natural lighting technique and a few camera settings.
Of course, lighting is a different subject oluştur to create quality visual ”is a very different subject, just knowing the logic of light does not mean that you will create quality visual.
Although visualization is a very comprehensive topic, we have touched on many topics in 3D visualization.
When you read all of them and you can come up with very good results.
There is a situation that applies to all rendering engines. In this way, you can capture the desired amount and quality of lighting in the work.
We will use the Sketchup Vray Next Render Engine in the rendering tests of this model. Logically the same procedure applies to all other engines. The same settings apply to Sketchup Vray versions 3.4 and 3.6 and to other rendering engines.
I will give you information about how to illuminate. You can download the model file from the link I will give at the end of the topic. Step by step we will determine how the lighting will be in this subject.
The Sketchup vray interior I found online is on the Ready Model, and most models don’t have an overlay. In this part, I will only touch on the light part, so we will see how light placement and lighting will be.
If you want to complete in the first kaplamalarını other models, Sketchup, our results give us your address Turkey group also link the work you have done over these issues paylaşabilirsiniz.grubu can also make a critical review and further develop yourself.
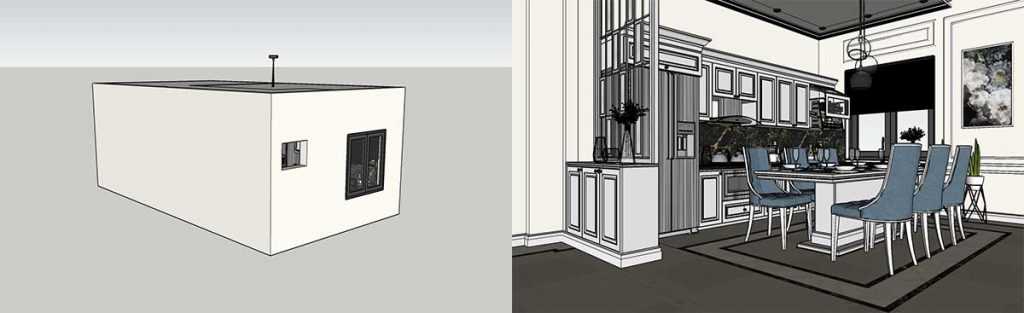
Sketchup vray interior model (top) from the left to the outdoor image, you can see the interior layout image on the right.
Because we do not cover the glass part of the window on the stage, a light source will not enter.
Therefore, first apply a glass coating from the ready-made coating library onto the glass model to make it a glass coating. If you are not familiar with these steps, first log into the program by following the Sketchup Vray Next tutorials in this section.
First, we will continue to use sunlight as the most natural light source in this scene. To position the sunlight through the window, adjust the sun at the Scene 1 viewpoint with the solar north plug.
You can watch our video here for shadow settings.
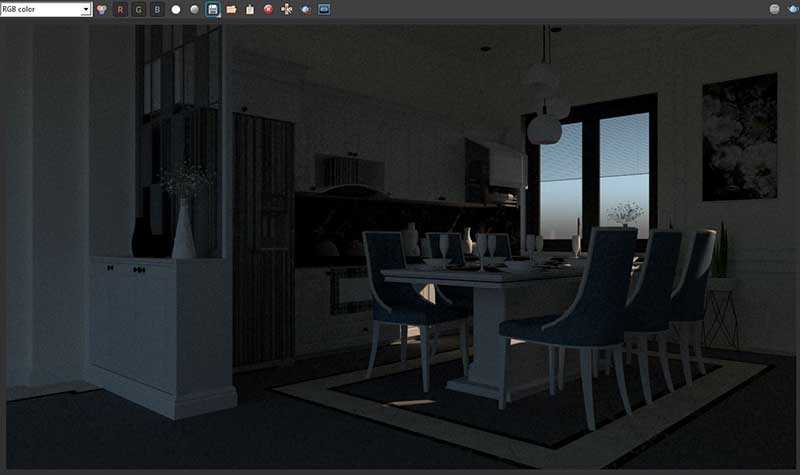
After you assign the glass coating to the glass model, you can press the Render button without making any adjustments and the image will be lightened as below.
Note: Don’t wait, there is no rush, we continue to illuminate the stage. 🙂
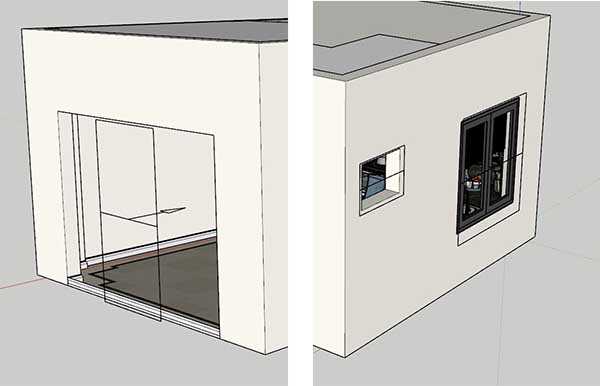
At this stage we can see that the light is still insufficient. Here we will now use two different methods, the first method is to use rectangular light source from the outside of the glass to the inside.
Also do not forget to mark the invisible part of the light settings.
The next step will be to adjust the camera settings in the Sketchup Vray Next settings.
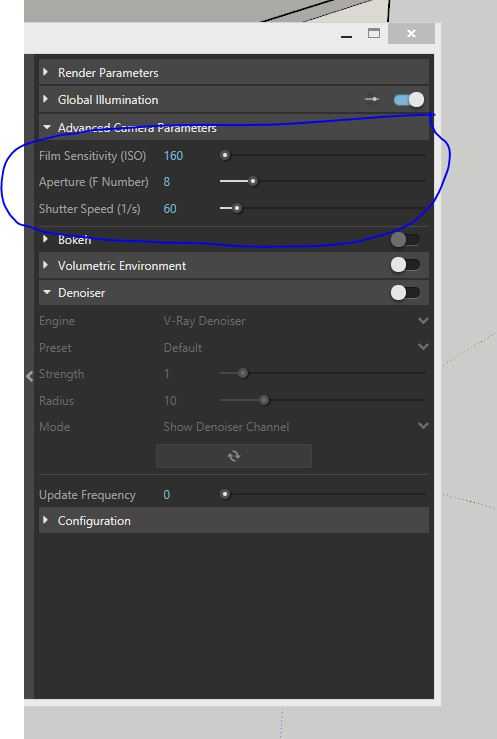
In this sketchup vray camera settings, the camera settings are especially well-known for the professional camera user.
Notice that I set the value of 300 to 60, increasing the amount of light that will enter the camera.
In order to prevent the explosion of the amount of light in the scene, I pulled the ISO value to a figure like 160. I ensured that the scene was illuminated as follows.
At the same time, it becomes difficult to control the light and the coating details on the models are lost.
What is Nois? Roughness on the stage due to lack of light.
Because too much light to hit the coating prevents the details from appearing and distorts the clarity.
When you make these settings, your Sketchup vray indoor scene will be effective as follows.
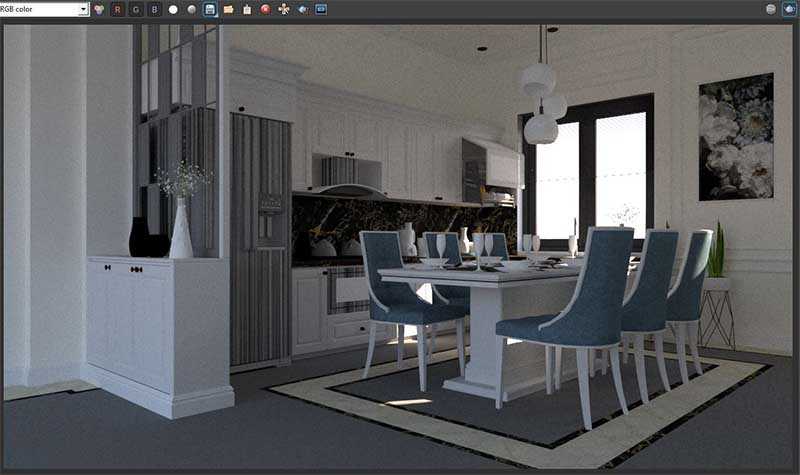
You can see that our scene is more illuminated with the Vray settings we made. We can see that there is still a quality problem on the side of the scene. This is because we get the normal quality rendering in the quality settings. Setting this to high or very high will solve the problem.
But this part is not important to us for now, our main goal is to adjust the light balance in a controlled way. Now you need to do the other setting, VRAY FRAME BUFFER window, which is located on the bottom left of the rendering screen and press the folder icon.
Show Corrections Control, when you press this section, the right side of the window will open a menu like the following. This section of the settings that we can make with Photoshop is a window and contains useful tools for us.
In this part, we can easily make the light balance that is missing on the stage. You can find the same settings on the rendering window of the 3dsmax Corona Render Engine.
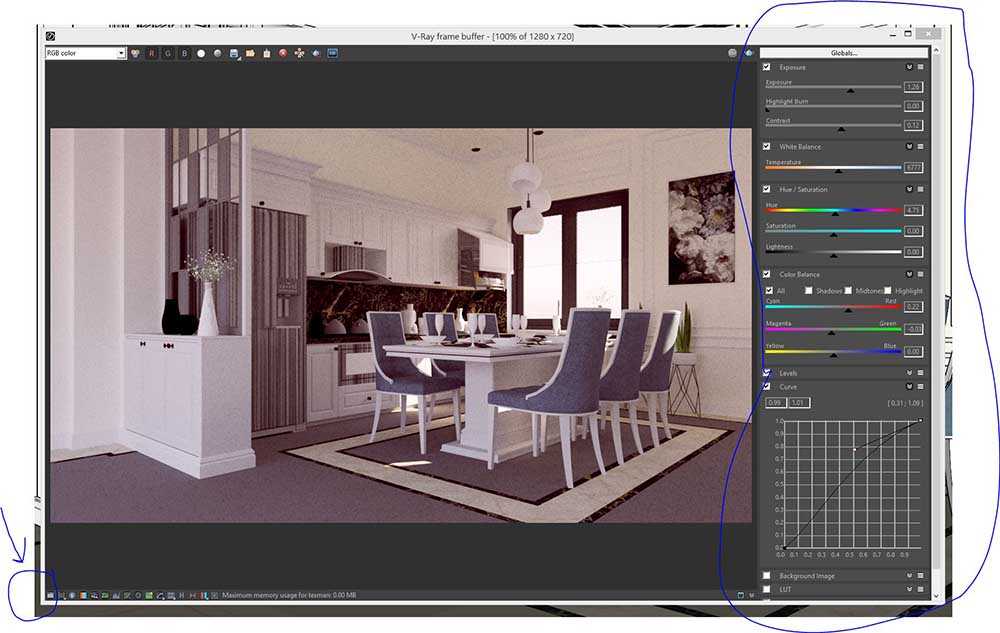
When you look at the settings made in the first visual and the last visual, you can see that the amount of light on the visual is balanced on the stage.
Customizing such settings on Vray settings will produce different results.
Some of our friends are looking for ready-made indoor scene settings. Because these settings are personal and different for each scene, the preset vray settings you have used will have no effect on your scene, but will cause you to work more on the scene.
Therefore, many people do not get enough results when they apply their preset settings to their own work.
In the Sketchup vray interior work, you can see in the study that there are still some places that need to be solved about light due to the lack of adjustment of the coatings and rendering at low settings.
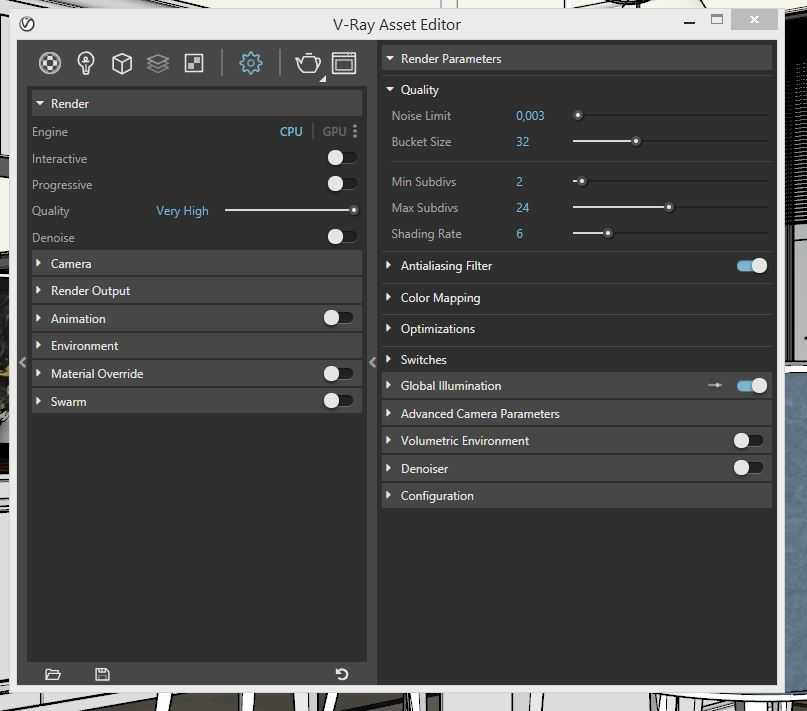
Adjusting the in-scene settings to high-quality settings (high or very high) and increasing the resolution, as well as rendering the resulting rendering result with light and color balance in programs such as Photoshop will be the solution.
You can maximize your settings with the following image. This will make the amount of light in the rendering more bright for dark areas. Of course, an important point here is that the amount of light on the stage is natural.
As an example of this work, you can add visual richness to the work by using extra lights in the kitchen worktop.
Sketchup vray indoor Learning the logic of lighting, changing the values to make tests by comparing the resulting results is a good way for you to continue. With these techniques, you can achieve very good results by taking more robust steps.
In our example model above, you will see a raw image because all of the models’ coatings are not adjusted.
But when you have made all the settings and the color balance of photoshop and the visual effects you will throw in the background with the result will be as follows.
You can bring the result of the rendering to different results with the programs in the best Photoshop Plug-ins for your Architectural Visualization works that we mentioned in this topic.
You get to review the results of studies Sketchup Turkey by publishing our group as well.
Download the work scene here. The work file belongs to Xuân Khánh.
I used this study as an example because it was shared as Free in the social environment.